So You Want To Be A Summoner? (Updated for 5.3)
OUTDATED: The information in this guide is no longer relevant to the current state of the game. Check out the Endwalker Summoner Guide Here: https://kastor-ffxiv.com/summoner-in-endwalker/
Note: Because this guide is intended for all levels of players, I do go into higher levels of detail about some basic concepts and why we do certain things - to hopefully foster better decision making instead of just following set rotations and falling apart when you make a mistake.
To view changes since this guide was published, scroll down to the Updates section or click here.
Where to begin?
I think it's helpful to start out with a description of what Summoner is and isn't - especially in regards to the history of the job since ARR, considering how often it gets significant portions of its skills reworked.
Summoner is currently a highly mobile caster that follows a repeating cycle of about 2 minutes of different types of casting. In the past, Summoner has been much less mobile because it required long periods of standing still and casting Ruin 3 back-to-back - which is currently only a short portion of our rotation. Right now, Summoner has access to many more instant-cast GCDs (if you don't know that term, see my guide on double-weaving here) which allow us to keep moving while casting for significant portion of most fights.
As of Patch 5.1, Summoner also does a fairly high amount of damage when played well - which combined with our high mobility allows us to significantly outperform other casters - especially when the group may not know a fight well enough to prepare for handling mechanics. Historically, Summoner is generally fairly weak at the beginning of an expansion and then receives some quality of life buffs that allow it to excel within a couple months. Additionally, because the class does so well with Critical Hit (more on this later) it becomes more powerful later on in any given expansion due to Crit's logarithmic scaling.
Given these points, it's hard to pin down what to expect when you play Summoner at any given point in time. The general, unchanging form of the class is that you will spend time both traditionally casting spells, and weaving oGCDs in between instant GCDs depending on what phase of the rotation you are in.
If you want a reliably simple job that always outputs a good amount of damage and can be expected to remain similar as the game continues, Summoner may not be for you. However if you want a rapid paced job with a plethora of tools that allow you to improvise and provide support to your party, look no further.
Where does SMN really excel?
Summoner is generally great for all types of content, but because we generally have more mobility than a Black Mage and access to the revive spell Ressurection while generally putting out better damage than Red Mage, SMN is a highly desired component of any progression group.
Being able to ressurect fallen healers (or others when your healers are otherwise occupied) can be the difference between seeing new mechanics your group hasn't reached before or falling flat and starting over.
Additionally, fights with a lot of AoE (as well as dungeons) allow Summoner to do absolutely ridiculous amounts of damage. Most of our large damage burst spells do AoE damage around their primary target and thus allow us to keep our general flow of combat the same while putting down huge groups of enemies effortlessly.
Ok, I want to play Summoner - but what do all these buttons do?
Summoner has a lot of abilities - not as much as some other classes but a lot more than you may be used to if you play something like Black Mage or Warrior. If you've hit level 80 already you probably have a good idea of what some or most of these skills do, but I've included a full glossary of spells and their usage at the end of this article - I recommend giving it at least a skim over to make sure you don't have any misconceptions.
For now, we'll go over the core concepts of the job.
Pets
The core design of Summoner has it revolving around pets - sort of. At all times you will have some kind of pet out.
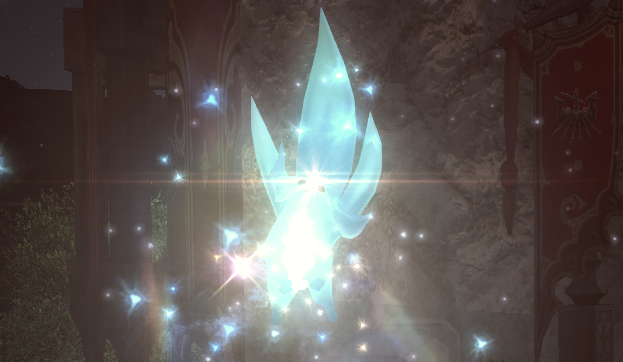
The first type of pets are your Carbuncles or Egis - these pets should be summoned when you begin a fight or dungeon and will never go away permanently unless you die - then they must be resummoned.
When you attack an enemy, your pet will attack them too unless otherwise ordered via the pet hotbar. Additionally many of your spells and abilities rely on a pet to activate.
Trances and Demi-Summons
Dreadwyrm Trance
Summoner has access to two special buffs called Trances. The first, Dreadwyrm Trance is available as soon as you start combat. It lasts for 15 seconds and reduces the casting time of all of your spells by 2.5 seconds. This means every spell except Ressurection is cast instantly. You also gain access to a huge damage oGCD called Deathflare. Using Deathflare ends your DWT immediately though, so you generally want to cast it when ending DWT early will line up with large damage buffs from your party.
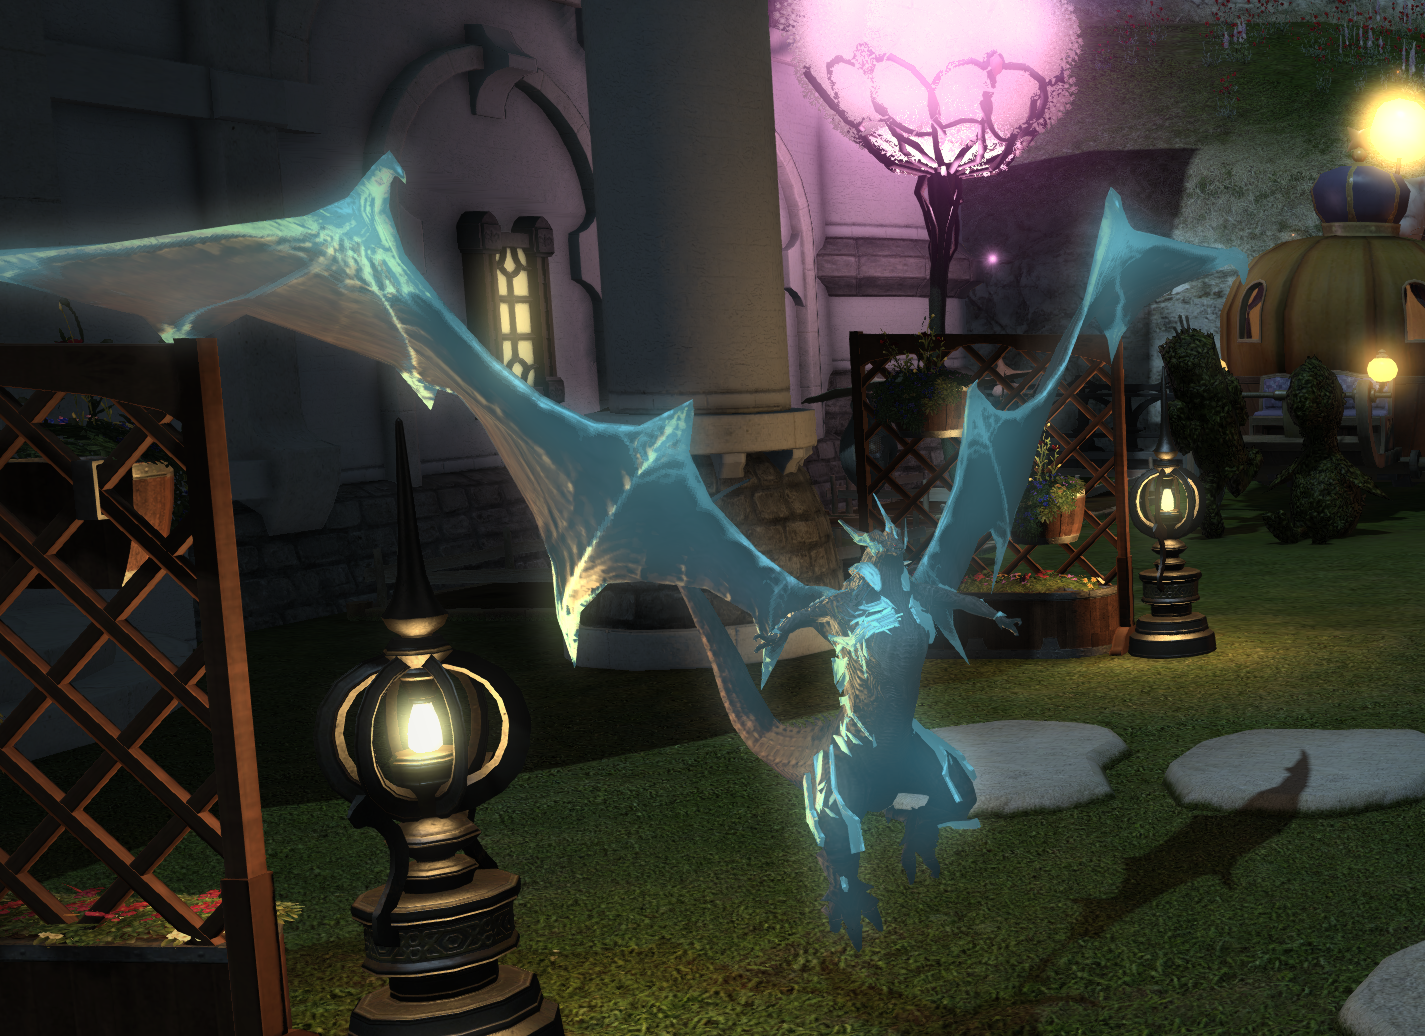
Demi-Bahamut
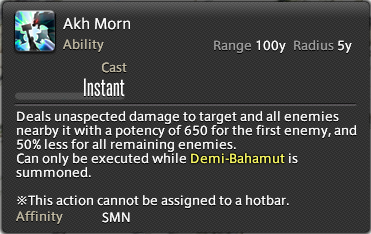
Once DWT ends, you can use Summon Bahamut which will temporarily put away your summoned egi and replace them with Demi-Bahamut for 20 seconds. If you master any particular phase first, this one is the most important as it comprises the largest portion of your damage. During this phase, each time you land a GCD, Demi-Bahamut will follow it up with Wyrmwave which does a large amount of damage. In addition, you gain the ability to cast Enkindle Bahamut which will make Bahamut cast Akh Morn - a large AoE nuke similar to Deathflare. Unlike Deathflare, you can cast this twice while Bahamut is out, though it has a 10 second cooldown so the first cast should be used ASAP.
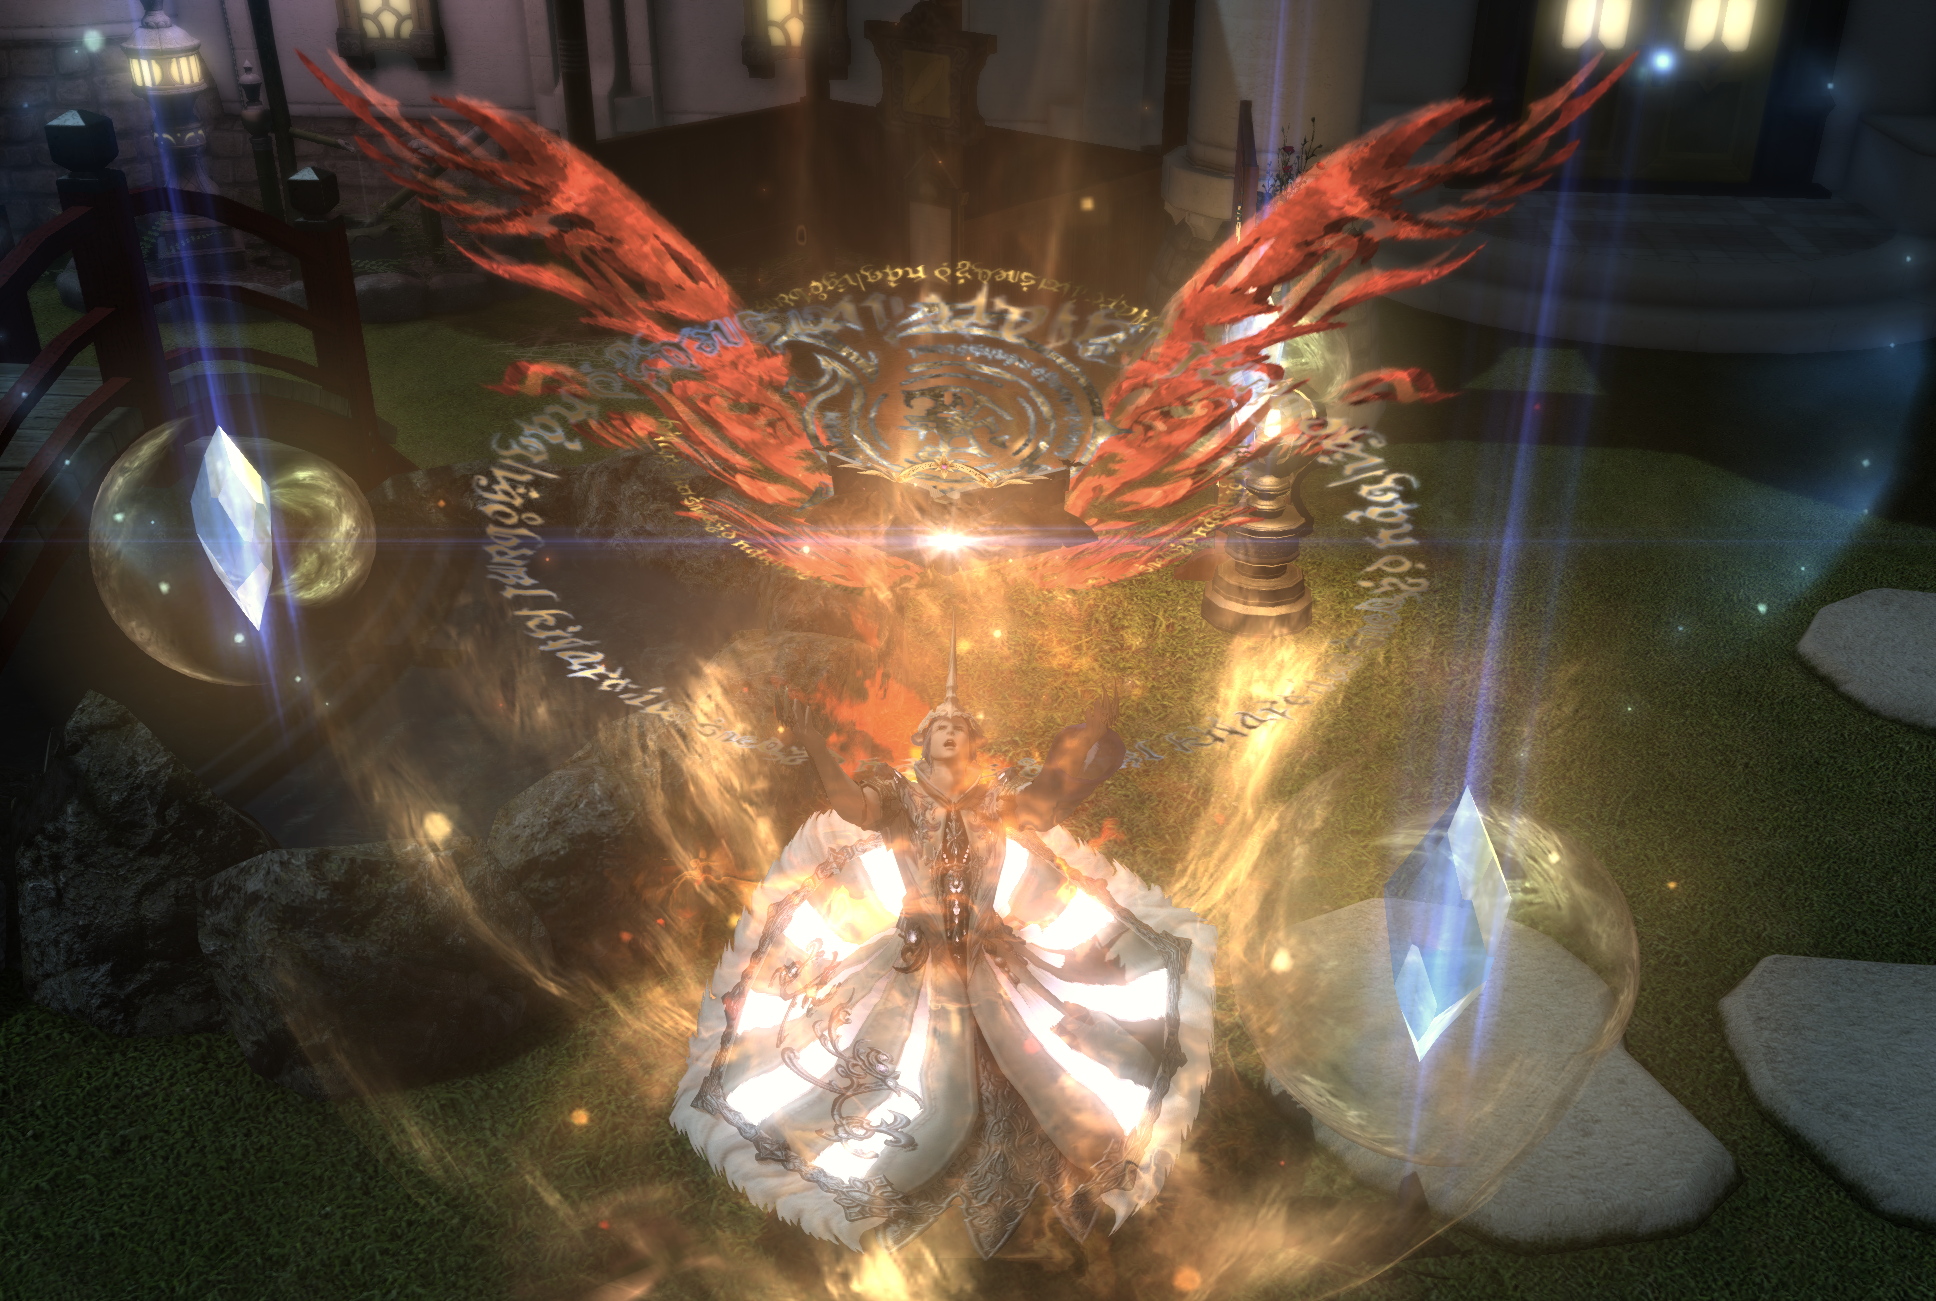
Firebird Trance & Demi-Phoenix
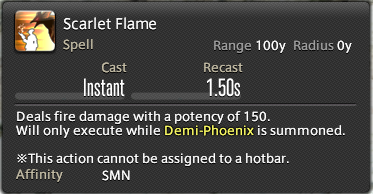
Once Bahamut disappears, your egi will return and your Dreadwyrm Trance turns into Firebird Trance - It lasts for 20 seconds and just like Dreadwyrm Trance it reduces your cast time by 2.5 seconds. FBT is actually somewhat like the last two phases combined - it also summons Demi-Phoenix, which follows your GCDs with a Scarlet Flame which behaves like Demi-Bahamut's Wyrmwave, enables you to use Enkindle Phoenix and turns Ruin 3 into Fountain of Fire and Outburst into Brand of Purgatory which can only be cast following a cast of Fountain of Fire.
Trances and Tri-Disaster
Both your Dreadwyrm Trance and your Firebird Trance will reset the cooldown of Tri-Disaster, making it available for use immediately after their activation. Since Tri-D does a large amount of damage and instantly resets your DoTs, this is an extremely important mechanic that should not be overlooked.
Cooldown Phases
In between your Bahamut Phase, as well as in between Firebird Trance and your next Dreadwyrm Trance, your focus will generally be on casting as many Ruin 3s as you can manage while using your Egi-Assaults and Ruin 4s to weave in your oGCDs such as Fester, Energy Drain and the like. Once your DWT becomes available, you start the whole process over. The entire rotation looks something like the following image, over a span of about 1.7 minutes.

Double Weaving
Needless to say, Summoner has a lot of spells. In order to effectively use them all when neccessary, you must double weave fairly often. If you're not familiar with the concept, you can see my guide here - or put shortly, it just means you need to be able to comfortably use two oGCD abilities after using an instant GCD and before the GCD cooldown ends.
Mastery
Now that you have an understanding of the core concepts of the job, it's time to get down into the details so you can play it at a high level. Many parts of playing Summoner well are not immediately apparent and come as the result of community members doing a lot of research and experimentation to discover the best uses of our abilities.
Stats
Summoners love Crit. Due to the high amount of instant spells available to SMN, spellspeed is almost useless. I say almost, because depending on your ping to the game server, it may be desirable to have a small amount of spell speed that reduces your GCD enough to get in Wyrmwave and Scarlet Flames you would otherwise miss to lag.
Secondary to Crit is Direct Hit - Crit's weaker cousin. Where critical hits come more often and do more damage the more Crit you have, direct hits always do the same general amount - the DH stat only increases the rate at which you get them.
Finally, the "dump" stat that all the rest of your melds and gear should fill is Determination. Det provides us a flat increase in damage and healing. It's nothing special but it does add up.
As always, Intelligence, our main stat is much more important than any of the above substats. Gear with an increase in Int is always preferred over substat increases. Weapon Damage is even more important than Int. When you can't decide between two pieces of gear, remember - Damage > Int > Crit > DH > Det > Anything else.
Mastering Demi-Bahamut - The 8 Wyrmwaves
Because Bahamut is summoned for exactly 20 seconds and the average GCD is 2.5 seconds long, Wyrmwave, which Bahamut casts on every GCD can only be fit a maximum of 8 times during your Bahamut phase. Ensuring you land 8 hits of Wyrmwave every single time, rather than 6 or 7 is part of what makes a good Summoner.
In order to assure you hit all 8, the very first GCD after summoning Bahamut must be instant and immediately after the summon, and the very last must be instant. I strongly recommend using Ruin 4 after summoning Bahamut, just before you cast Enkindle Bahamut.
For the final Wyrmwave, I recommend either using a Ruin 4, or casting Ruin 4 as the second-to-last GCD during bahamut phase, then weaving in a Swiftcast and making the last GCD an instant Ruin 3.
Practicing this phase on dummies an ensuring you can always get all 8 hits is essential to playing SMN well in endgame content.
Mastering Demi-Phoenix - 8 Scarlet Flames and Demi-lag.
As you've probably guessed, during the Phoenix phase it is also absolutely essential to get out 8 Scarlet Flames. This is made easier by the fact that FBT makes our GCDs instant during this time, but there's a catch.
Demi-Phoenix is unresponsive for the first half second or so after its summoned. If you summon it and immediately use a GCD... you may not get a Scarlet Flame at all, or you may get one so late that all your others are delayed and you're prevented from getting 8.
To solve this issue you have two real options - you can Single Weave your summon Phoenix, so you hit an instant GCD, cast Firebird Trance, then cast your Fountain of Fire when the GCD cooldown is over - or you can double weave Phoenix + Enkindle, so that the first half second or so of her Summon is spent casting Revelation, following that with your Fountain of Fire GCD.
As with Bahamut, practicing this on a dummy until you're sure you can hit 8 every time is extremely important to being a good SMN.
Demi Positioning
Demi-Bahamut and Demi-Phoenix have a strange quirk around using their respective Enkindle abilities, Akh Morn and Revelation. They don't want to cast them unless they are in a cardinal or intercardinal position around their owner. This can result in a significant delay after pressing the Enkindle ability before the Demi summon actually uses the ability, especially in periods of high movement when they are following you and trying to re-align themselves to your postion.
Generally, as long as you ensure to cast your Enkindles early on in the summon phase you should not have a problem with this, but it is something to keep in mind during high movement fights.
Openers
I wont go into a lot of detail here because better resources exist, but the current ideal opener for most fights is diagramed in this infographic from The Balance:

Following this diagram, you would begin casting your first Ruin 3 exactly 2.5 seconds before the boss is pulled, and hit sic so your pet begins running to the boss just a half second before the pull - this way your first hit and your pets first hit are immediate. From then on, you would hit Egi-Assault 1 as your first GCD, then weave in Energy Drain and Tri-Disaster before hitting Egi-Assault 2, then weave a potion in, etc...
As you can see along the bottom of the graphic, this lines up your biggest burst of damage - Deathflare, Akh Morn, two Ruin 4 casts and several Wyrmwaves within most of your party's damage buffs, which for the most part come in a 2-minute cycle. To maintain that alignment with those buffs, your rotation must also stay in a 2-minute cycle which is why it is absolutely important that you use your trances exactly when you're supposed to.
There are a lot of ways to vary from this opener, and what works for each individual fight may vary. I encourage you to experiment and come to your own conclusions.
The 10-second delay.
You may have noticed that your trances have a cooldown of 55 seconds, while your Tri-Disaster, which is reset by your trances, has a cooldown of 50 seconds. Because of this difference, if you were to use your trances immediately when they're available every time, you'd just barely miss out on free casts of Tri-D only seconds before you can reset it.
To solve this problem, every time Firebird Trance becomes available, you wait 10 seconds before casting it. This not only gives you an extra use of Tri-D, making it so you only have to hard-refresh your DoTs once per 2 minutes, but it has the bonus effect of ensuring you stay on your 2-minute cycle, aligned with all of those nice damage-increasing raid buffs!
Final Word
The above information is how to play SMN optimally as I understand it. This information comes from not only myself, but the hard work of many other members of the FFXIV community and all of our experimentation and verification of these ideas. Given that I've been able to achieve 90-99th percentile parses with this information, I generally believe it to be more than good enough to get you to the point you know how to ask the right questions to improve further.
If you've studied this guide and put these ideas into practice but are still coming up short, I strongly recommending coming over to the #smn_questions channel on The Balance discord server for help.
Updates
5.2
- The Damage over Time potency of Bio 3 has been reduced from 50 to 45.
- The Damage over Time potency and application potency of Miasma 3 has been reduced from 50 to 45.
No major changes in rotation or priority.
5.3
- The potency of Tri-Disaster has been changed from 300 to 150.
Most likely no major changes in rotation or priority.
Spell Glossary
The following is a description of all spells available to Summoner and their general use.
Special Mention: Physick
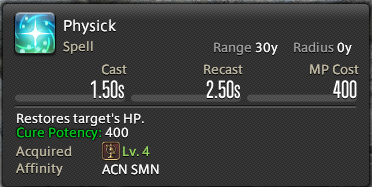
As Summoner and Scholar both share the same base class of Arcanist, Scholar's basic heal is available to us. However unlike with Scholar, Physick does not scale with Summoner's primary stat. Using Physick on a Summoner will never do much more than 1% of anyone's HP pool. It's not even worth it to keep it on your bar.
Seriously.
Bio III & Miasma III
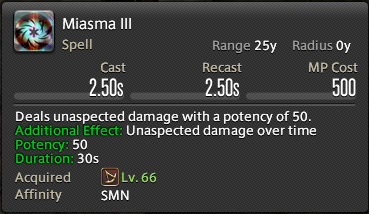

Bio and Miasma are your core DoTs (Damage over Time) and generally account for 16-18% of your total damage when used properly. These should be immediately applied to any enemy that will be alive for ~15 second or more and never allowed to expire.
Tri-Disaster
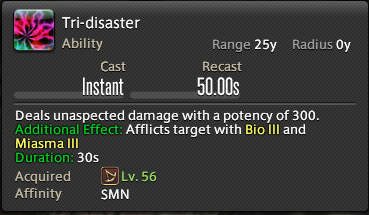
Tri-D saves you the trouble of having to cast Bio & Miasma on an enemy by applying them both instantly - while also hitting them with a decent amount of extra damage. You will generally still have to apply Bio & Miasma manually a few times during a fight due to Tri-D's cooldown being longer than the duration of both DoTs, but Tri-D will account for all but one refresh of DoTs every two minutes. Your Trance spells also reset the cooldown of Tri-D, making it immediately available again.
Bane
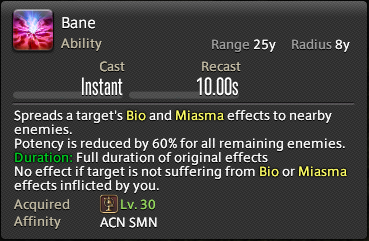
Only used in AoE situations, Bane saves you the trouble of applying your DoTs to multiple enemies around the target. It's important to remember that these new DoTs applied by Bane will only do 60% of the damage they normally do - so it's not always desirable to spread with Bane in a 2-target situation.
Ruin III

Ruin 3 is the bread and butter spell of the Summoner job. When there's nothing else to cast and you can reliably stand still for ~2.5 seconds, you'll be casting this on repeat.
Outburst
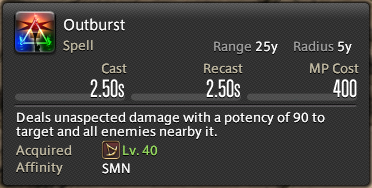
Outburst is a full GCD cast AoE ability. Because it has less than half the damage of Ruin 3, it shouldn't be used on less than 3 targets.
Ruin II
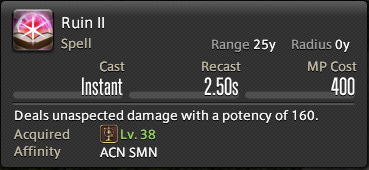
Ruin 2 is just like Ruin 3, but weaker and instant - at level 80 you will generally never touch this spell unless you've made a mistake, but it must be kept on your bar because under certain conditions it turns into...
Ruin IV
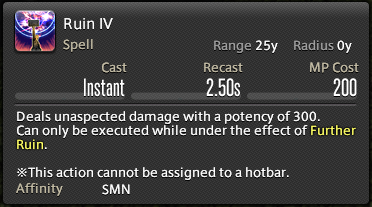
Ruin 4 is an upgraded version of Ruin 2 - it's still instant but does even more damage than Ruin 3. It's core use is to enable you to fill the time between its instant cast and your next cast with oGCD abilities like Tri-Disaster, Fester and Energy Drain.

Ruin 4 can only be used when under the effect of the buff Further Ruin, which can be stacked up to 4 times. It is extremely important that you never accumulate chargers of Further Ruin when you already have 4 stacks as you'd lose a use of Ruin 4 for each one.
Summon, Summon II and Summon III
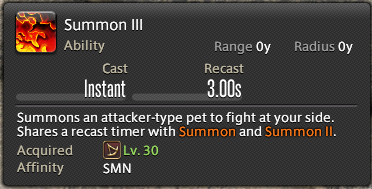
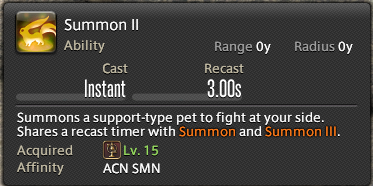
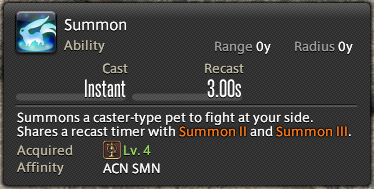
Summon 1, 2 and 3 are used to summon your pets - at low levels, Carbuncle and at high level Egis (though these can be glamoured to look like Carbuncles).
As of patch 5.1 their uses are as follows:
- Summon - Summons Garuda/Emerald Carbuncle. This pet should be used for AoE situations only.
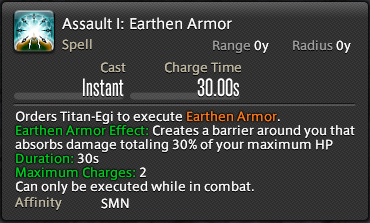
- Summon 2 - Summons Titan/Topaz Carbuncle. This pet should only be used for mitigation. It;s Egi-Assault 1 ability provides you with a 30% HP shield, doing no damage and cannot grant you a charge of Further Ruin. For this reason, using Titan in most group content is frowned upon unless it is necessary to survive (for example, learning new content where healers may be overtaxed or not know incoming damage timing yet).
- Summon 3 - Summons Ifrit/Ruby Carbuncle. This pet should be used for single-target fights. Ifrit's single target damage is much, much higher than the other two pets and should be used by default unless the situation specifically needs AoE or a strong personal shield that a healer cannot grant you.
Egi Assault 1 & Egi Assault 2
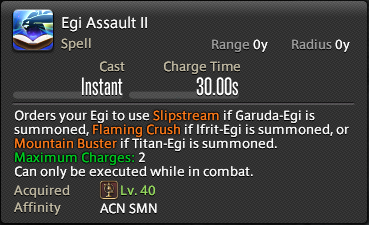
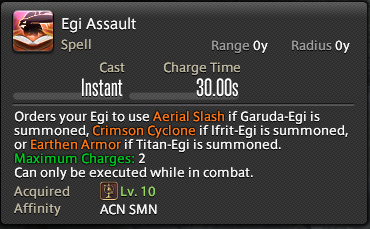
The Egi Assault spells are your primary way of interacting with your summoned pets - Garuda-Egi (who replaces Emerald Carbuncle), Titan-Egi (who replaces Topaz Carbuncle) and Ifrit-Egi. These spells have an entirely different effect based on which pet is summoned, but each one will cause your pet to use a special ability when pressed.
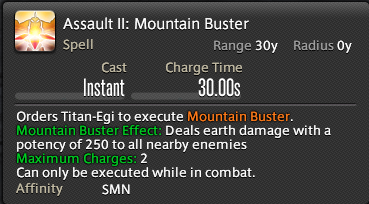
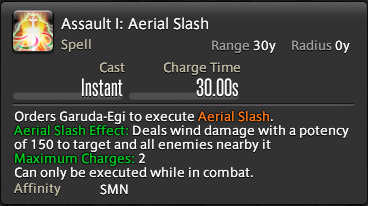
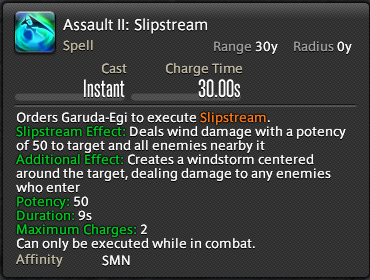
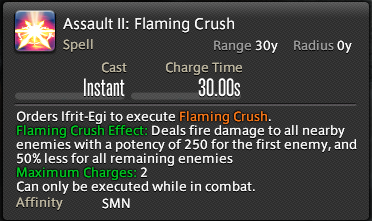
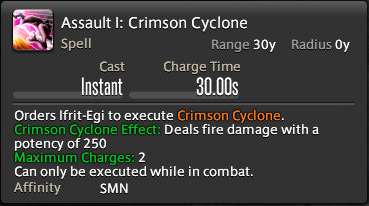
Beginning at level 62, Egi-Assault I will grant you a stack of Further Ruin every time you use it - upgrading Ruin 2 into Ruin 4. At level 74, Egi-Assault II will do the same.
Each Egi-Assault ability has 2 charges - when in combat, you should make sure you never allow them to fully refill both charges before using them, as doing so would cost you both Ruin 4 stacks and give you less overall uses of Egi-Assault.
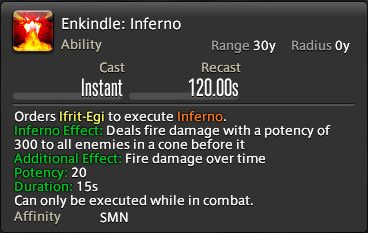
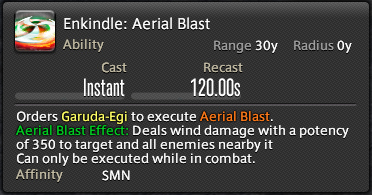
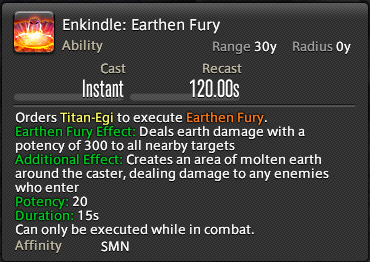
Enkindle
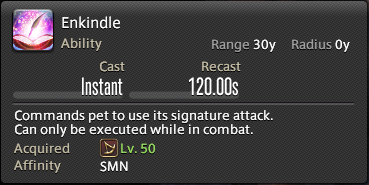
Enkindle is much like Egi-Assault in that it commands your pet to use a special ability, which changes depending on which is summoned. It can only be used once every 2 minutes however, so it's best used when under the effect of as many party buffs as possible to make the most of its high damage.
Devotion
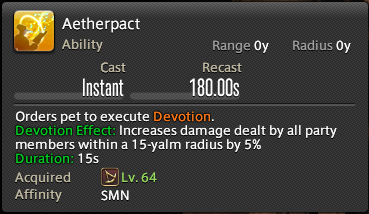
Devotion is the third and final combat ability that affects your pets. Unlike Egi-Assaults and Enkindle, Devotion's effect is the same regardless of which pet is summoned.
As devotion provides a simple damage-up buff, it is best used at the same time as other party buffs so as to increase the damage of large burst abilities generally used during that window. Keep in mind its range is somewhat limited - if your pet is attacking a target on the opposite side of a platform from some of your party, you may be better off waiting until the group is back together to execute Devotion.
Energy Drain & Energy Siphon
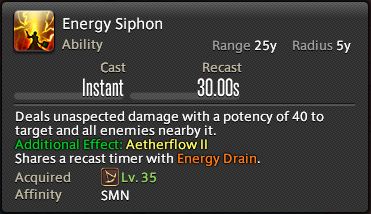
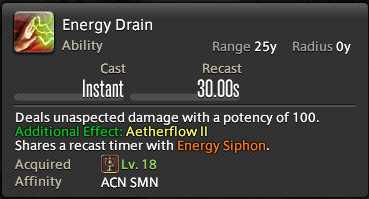
Energy Drain and it's AoE counterpart, Energy Siphon are how Summoner gains its Aetherflow resource - required for casting Fester and Painflare - and as such should be used on cooldown as soon as it is available.
As both spells are oGCD, they should be casted following a Ruin 4, instant Ruin 3 or Egi-Assault.
Fester
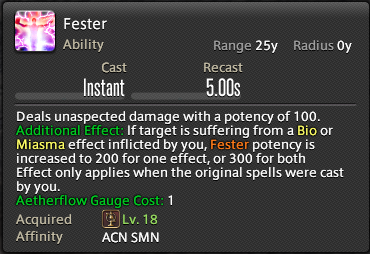
Fester is the first high-damage burst spell available to summoner at level 18 and requires one charge of Aetherflow to use. The special thing about Fester is that it requires both Miasma and Bio to be active on the target to be worth using. As a good summoner will always have both DoTs active on the target at all times, this shouldn't be a problem - but be careful not to blow it on new targets, or when a boss has just come back from an invulnerability phase and you have yet to apply your DoTs.
As it is available quite often, and is an oGCD, Fester should generally be used as soon as possible unless you are in an AoE situation, in which you would instead use...
Painflare
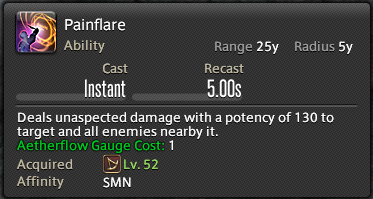
Painflare, like Fester, requires one charge of Aetherflow to use. Unlike Fester though, Painflare does not require any DoTs to be active on the target to deal its full damage.
As painflare's damage is less than half, but more than one third of Fester's, it should not be used on 2 or less targets. Stick to Fester unless at least 3 enemies will be hit by Painflare.
Dreadwyrm Trance

Dreadwyrm Trance, or DWT is the first of SMN's two Trance spells. It has several effects:
- All of your spells cast 2.5 seconds faster - meaning anything other than Ressurection is cast instantly.
- Tri-Disaster immediately becomes available for use if it was on Cooldown prior to executing DWT.
- Deathflare becomes available for use.
- When it ends, Demi-Bahamut becomes available for summoning.
Dreadwyrm Trance should always be used immediately when it is available after your opener.
This action turns into Firebird Trance after summoning Bahamut.
Deathflare
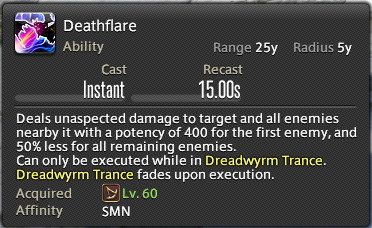
Deathflare is a very high damage AoE nuke that is only available during Dreadwyrm Trance. It will also end DWT immediately when it is cast and thus should rarely be used any sooner than 1 second before DWT would end naturally.
Summon Bahamut

Summon Bahamut will immediately put away your currently active Egi, and call Demi-Bahamut to your side. It is 0nly available for cast following the end of Dreadwyrm Trance.
During this time, each time you cast a damaging GCD spell or ability, Bahamut will attack the same target with Wyrmwave -
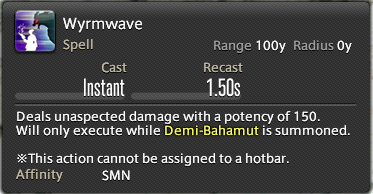
While Bahamut is active, you can cast Enkindle Bahamut.
Enkindle Bahamut
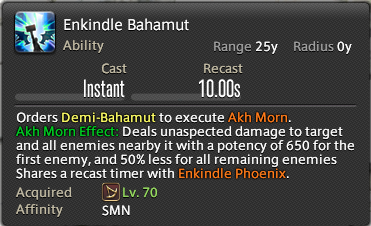
Enkindle Bahamut, not to be confused with the Egi-affecting Enkindle, orders your Demi-Bahamut to cast Akh Morn, a high damage AoE nuke.
Enkindle Bahamut can be used twice during the time Demi-Bahamut is active. This action turns into Enkindle Phoenix during Firebird Trance.
Firebird Trance
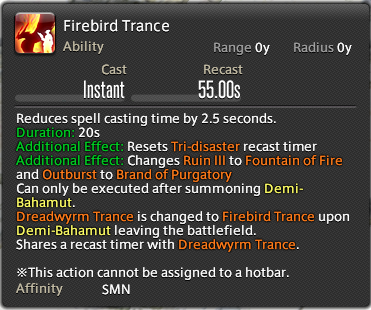
This action shares a button and cooldown with Dreadwyrm Trance, and just like DWT it reduces the cooldown of all of your spells by 2.5 seconds and resets the cooldown of Tri-Disaster. However it also has some differing effects:
- It immediately summons Demi-Phoenix on cast.
- Demi-Phoenix then casts Everlasting Flight, a 100 potency Heal over Time.
- It changes Ruin III into a higher damage spell called Fountain of Fire. It changes Outburst into a higher damage spell called Brand of Purgatory.
While Demi-Phoenix is active, each time you cast a damaging GCD it will attack the same target with Scarlet Flame -
During this time, you can also cast Enkindle Phoenix.
Fountain of Fire
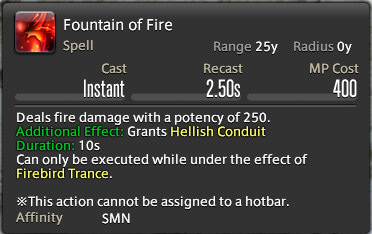
Fountain of Fire replaces Ruin 3 during Firebird Trance. Casting Fountain of Fire also grants you the Hellish Conduit buff, which allows one use of Brand of Purgatory.
Brand of Purgatory
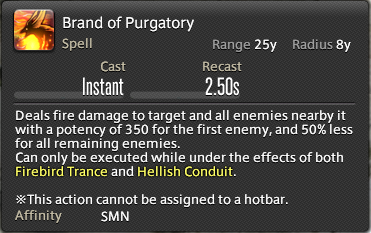
Brand of Purgatory replaces Outburst during Firebird Trance. It is not available for casting unless you have the Hellish Conduit buff from casting Fountain of Fire and it will consume the buff when cast.
During FBT, you should cast FoF followed by BoP back and forth, weaving your oGCDs like Enkindle Phoenix in between them.
Enkindle Phoenix
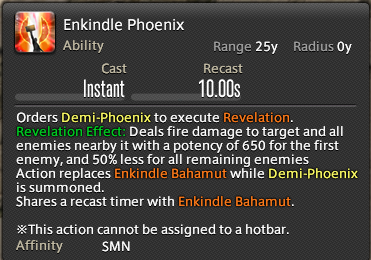
Enkindle Phoenix works exactly like Enkindle Bahamut. Except it's cast during Firebird trance and it's uhh... orange.
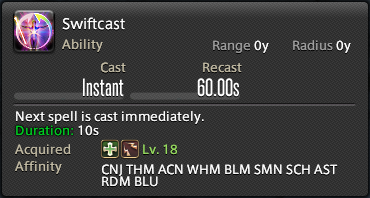
Ressurection
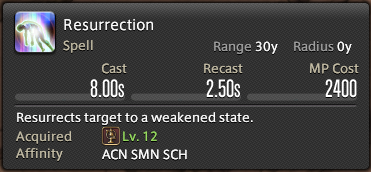
Summoner, along with Red Mage is a DPS that can revive other players. This skill is invaluable during progression, though not often used afterwards. Unlike RDM we have no way of making it instant other than Swiftcast, so be sure to save Swift when you're still learning a fight to help your healers ressurect others (or themselves).
Limit Break
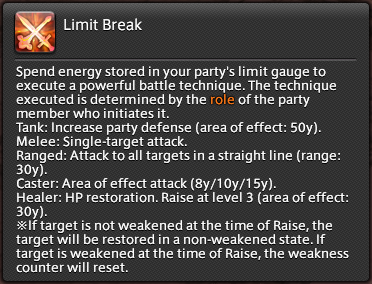
Summoner's level 3 Limit Break is Teraflare - a large AoE blast that does less damage than a melee limit break, but more than a Ranged limit break. There are very few places its actually useful outside of nuking large trash pulls in dungeons - but it is required in Ultima Weapon Ultimate.
Pet Actions
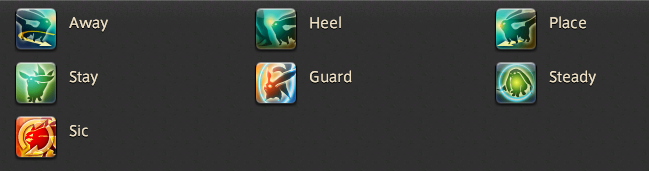
Like Scholar, Summoner has access to micromanagement skills that command its pets. You will rarely use these other than Sic, but I recommending keeping Place on your bar as well - it can be helpful to re-align your pet's position for fights with extreme movement, such as Eden 3 - Innundation.
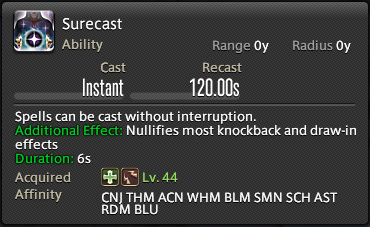
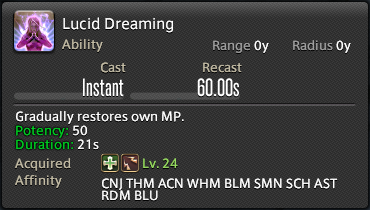
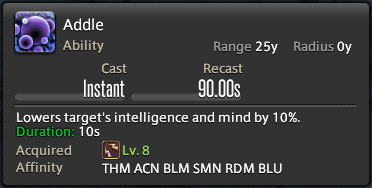
Role Skills
Summoner shares the same cross-class abilities as all Caster DPS - all 4 are extremely useful, and should be kept on your bar for any fight.